一、分支管理规范
1. Git Flow 模型
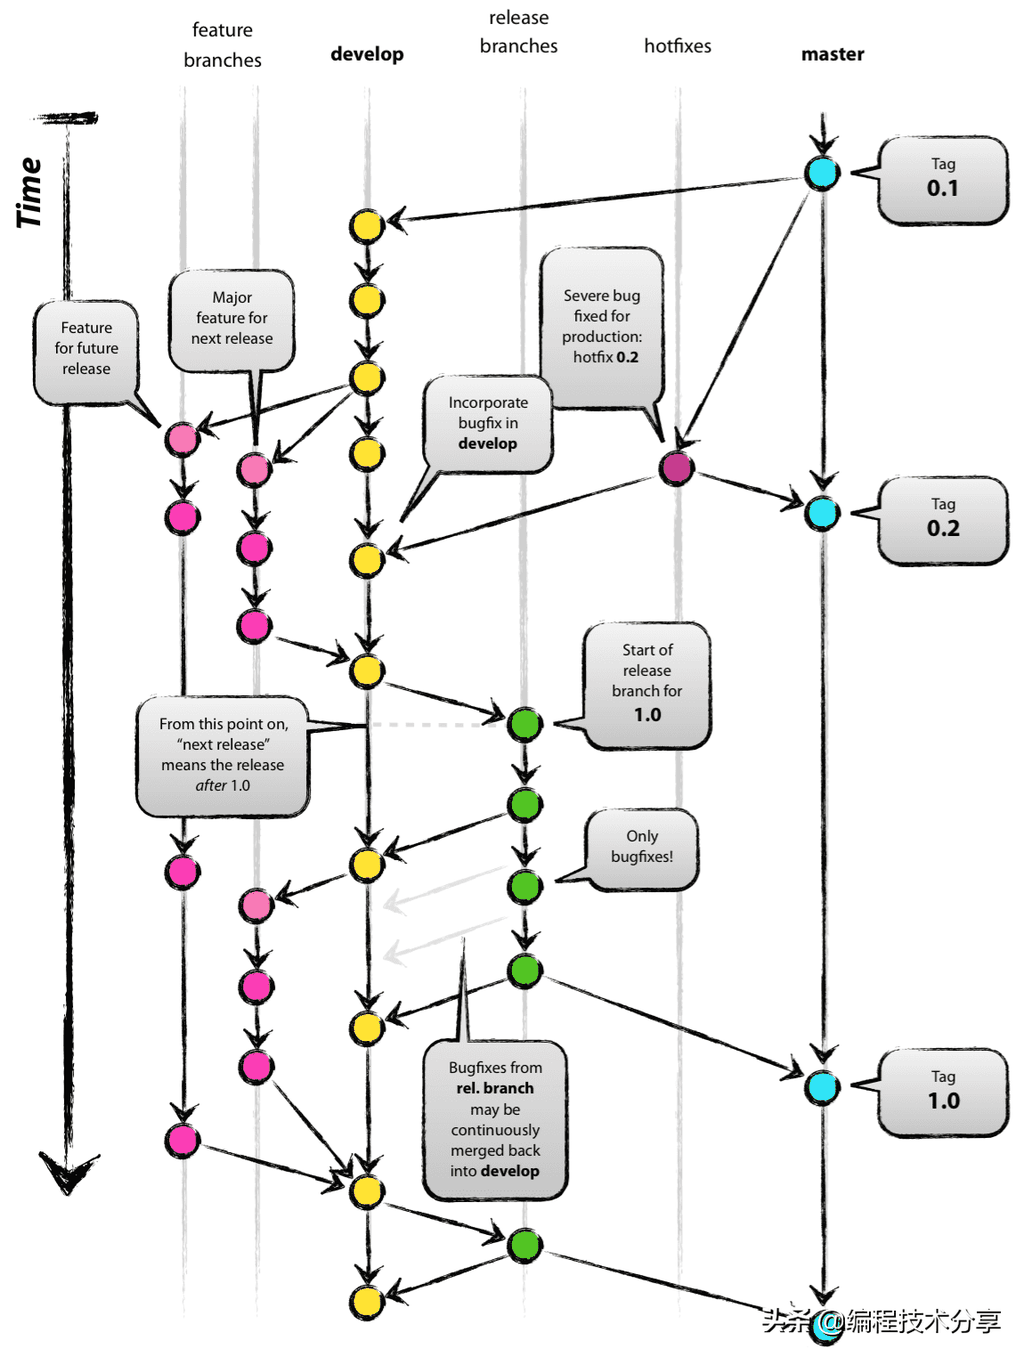

(图片来源:ProcessOn 模板)
2. 代码评审流程
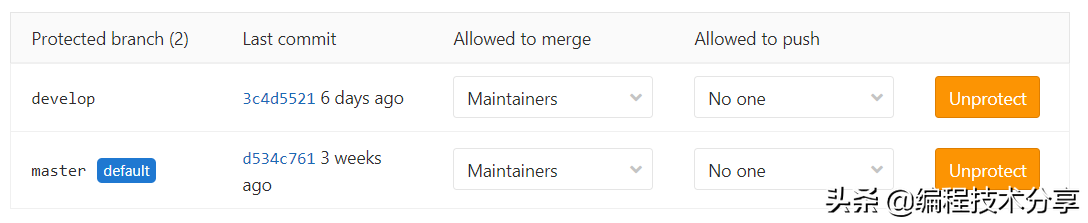
将 master 和 develop 分支设置为保护分支,只能是 Maintainers 角色 可以合并请求,并且禁止直接 push 代码。
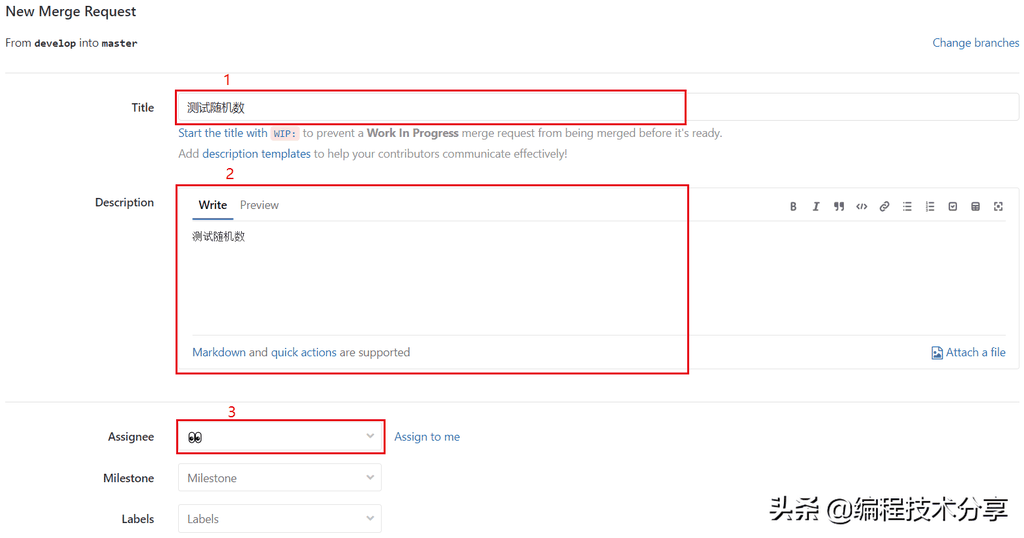
2. 填写必要信息
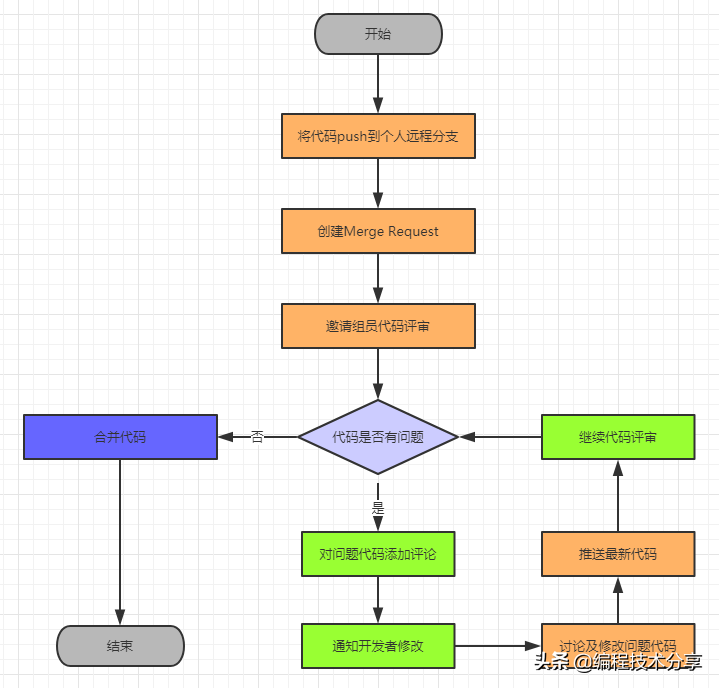
3. 代码评审及合并请求

1. 提交合并请求时,先同步最新代码
提交合并代码前,建议先执行 git fetch 和 git merge/rebase 将 develop 分支下的最新代码更新到开发分支,再提交合并请求,避免造成冲突。
2. 合并代码到 master 分支
通过 develop 分支提测且测试通过后,将 develop 分支的代码合并到 master 分支进行发版,版本发布完成时及时打标签。
四、Git 项目集成构建
1. 简介
GitLab-CI
GitLab-CI 是 GitLab Continuous Integration(GitLab 持续集成)的简称。
只要在项目仓库的根目录添加 .gitlab-ci.yml 文件,并且配置了 Runner(运行器),那么每一次合并请求 MR 或者 push 都会触发 CI pipeline。
GitLab-Runner
GitLab-Runner 是 .gitlab-ci.yml 脚本的运行器,GitLab-Runner 是基于 GitLab-CI 的 API 进行构建的相互隔离的机器(或虚拟机)。GitLab Runner 不需要和 GitLab 安装在同一台机器上,同时考虑到 GitLab Runner 的资源消耗问题和安全问题,也不建议这两者安装在同一台机器上。
Pipelines
Pipelines 是定义于 .gitlab-ci.yml 中的不同阶段的不同任务。
Pipelines 可理解为流水线,流水线包含有多个阶段(stages),每个阶段包含有一个或多个工序(jobs),比如先购料、组装、测试、包装再上线销售,每一次 push 或者 MR 都要经过流水线之后才可以合格出厂。而 .gitlab-ci.yml 正是定义了这条流水线有哪些阶段,每个阶段要做什么事。
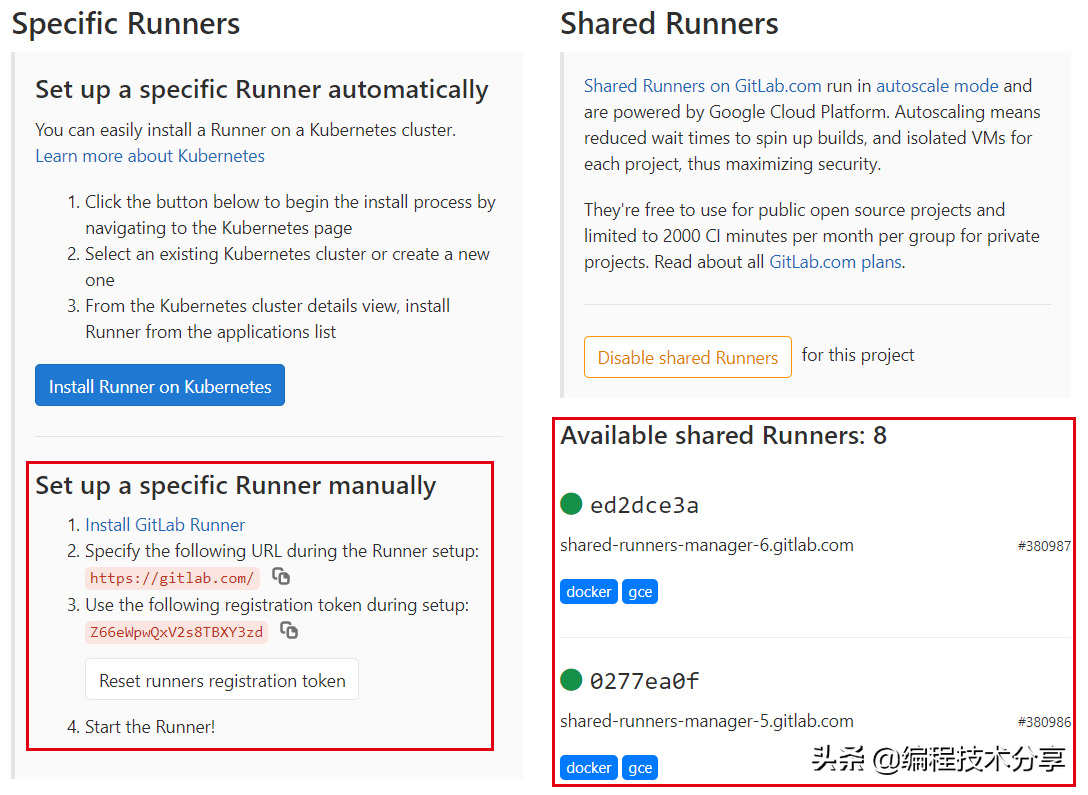
2. GitLab-CI 功能配置
GitLab-Runner 安装(macOS)
Install and start gitlab-runner:
brew install gitlab-runnerbrew services start gitlab-runnerRegister gitlab-runner:
gitlab-runner register配置以下参数:
Please enter the gitlab-ci coordinator URL (e.g. https://gitlab.com ):Please enter the gitlab-ci token for this runner:Please enter the gitlab-ci description for this runner:Please enter the gitlab-ci tags for this runner (comma separated):Please enter the executor: ssh, docker+machine, docker-ssh+machine, kubernetes, docker, parallels, virtualbox, docker-ssh, shell:具体配置项的值可参考项目信息(Project -> Settings -> CI/CD -> Runners):
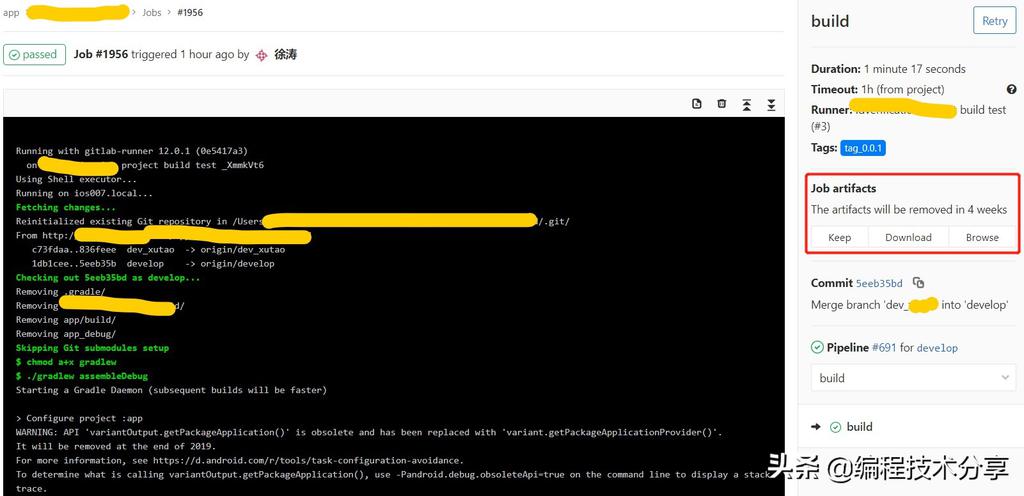
点击列表,可看到单个 job 的执行情况,包括控制台日志输出和文件产出:
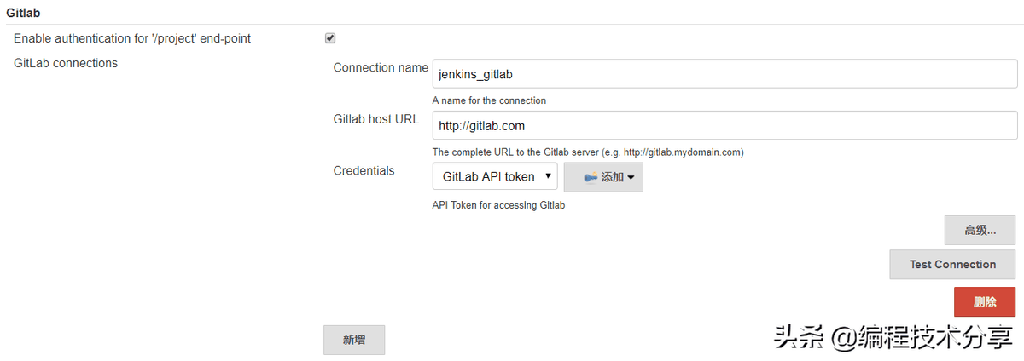
打开“系统管理” -> “系统设置” -> “GitLab” 配置 GitLab 服务:
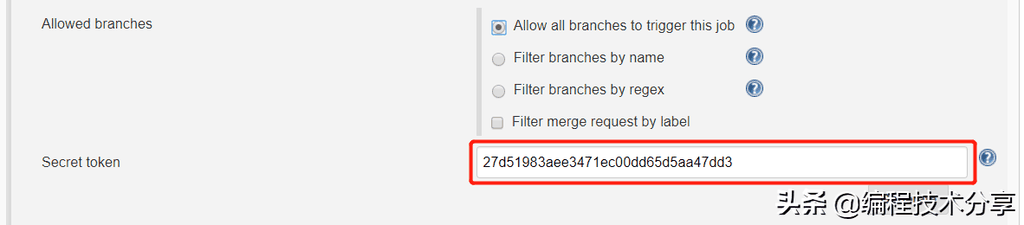
打开“高级”,生成 Secret token,配置 GitLab 的时候,需要用到:
配置完成,当 push 代码或者合并请求时,会自动触发 Jenkins 构建。